Title here
Summary here
December 30, 2023 in Technical6 minutes
Step-by-step guide on building an Ubuntu profile for Volatility 2 and fixing the errors.
When we are doing memory analysis using Volatility 2, we have to specify the profile of the memory dump. This ensures the tool analyzes the memory dump correctly and provides accurate results. In this blog, I will be writing on how to build a Linux (Ubuntu) profile on Volatility 2 for memory analysis. It might sound easy at first, but you might face a lot of errors during the process.
I will be going through from start, which is when we get the memory dump and identify the profile, all the way through building the profile in Volatility 2 and fixing bugs and errors. I will be using the memory dump that I got from a CTF competition, named cydes.raw.
To build a new Volatility 2 profile:
Volatility 2 does not have any Linux profile by default. All the profiles available are in Windows operating system.
python2 vol.py --info | grep ProfileWe can use the command above to see all the profiles available in Volatility 2.

Therefore, when we are going to analyze the memory dump with the profile that is not available in default Volatility 2, imageinfo plugin will show that there is no suggested profile, as it could not find any information from the available profile.
In order to build a Linux profile, we need to identify which distribution and kernel version used.
strings <FILE> | grep -i "GNU/Linux"We can use the command above to get more information that we want.

Based on the output, we know it is running Ubuntu 22.04 LTS, with the kernel version of 5.15.0-75-generic x86_64. Therefore, we need to install an Ubuntu 22.04 LTS virtual machine to get the kernel profile.
💡 Some people use docker instead of creating the entire virtual machine, you can find more information here.
Once the installation of the Ubuntu virtual machine is done, we need to update the kernel version to the version we would like to build a profile for.
sudo apt update
sudo apt install linux-image-5.15.0-75-generic
sudo apt install linux-headers-5.15.0-75-genericlinux-image-5.15.0-75-generic: It is the actual kernel that will be running
linux-headers-5.15.0-75-generic: It is the kernel header that has the necessary information for compiling software
After that, we need to reboot the machine to update the changes.

Once rebooted, we can list all the downloaded kernels to verify the installation.
If the kernel from the virtual machine we downloaded is more up-to-date, it will not update the kernel we want for us.
uname -rYou can use the command above to verify if your kernel has been loaded successfully as it will show the kernel version that the system is currently running.
If the kernel version remains the same, we need to downgrade the kernel version by choosing the kernel version in GRUB menu.
💡 GRUB menu is an interface that allows user to choose the kernel version when a Linux operating system is booted.
To load GRUB menu, you can use shortcuts (refer here), but that did not work for me so I will use another method which will show GRUB menu every time the system boots.
sudo nano /etc/default/grubWe can use nano to edit the GRUB menu configuration file.
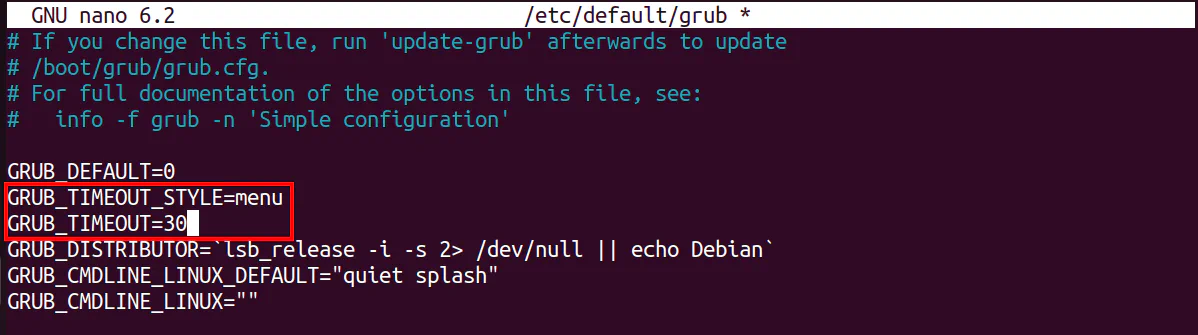
Edit GRUB_TIMEOUT_STYLE variable and GRUB_TIMEOUT variable to the value above so that the menu will appear when the system boots.
💡 You can put any value you prefer for
GRUB_TIMEOUTother than 0. If you put 30, it means it will be timed out after 30 seconds and continue booting the system if you left the menu unselected.
sudo update-grubOnce done editing, run the command above to update the configuration. Then, restart the machine to load GRUB menu.
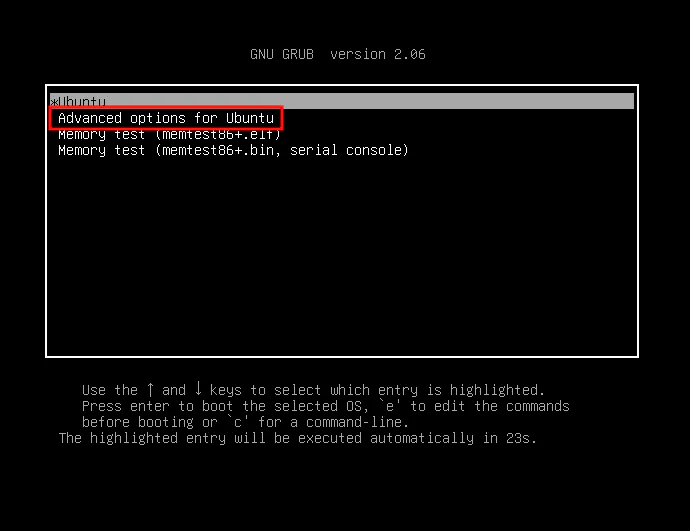
Once GRUB menu loaded, choose Advanced options for Ubuntu.
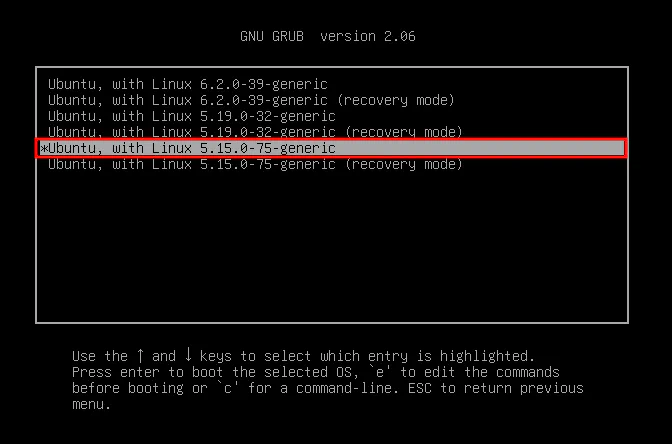
Then select the kernel version that we would like it to load.
Now we are moving on to build the profile. Before we start, let’s install some of the tools:
sudo apt install dwarfdump build-essential dwarfdump: A tool that analyzes and dumps the DWARF debugging information
build-essential: Meta-packages (a set of packages) that are necessary for compiling software
💡 DWARF: A file format for debugging information
Let’s install the most important tool: Volatility 2
sudo apt install git
git clone https://github.com/volatilityfoundation/volatility.git
python2 setup.py install
Then, change directory to volatility/tools/linux to compile necessary components to build the profile by using the command make.
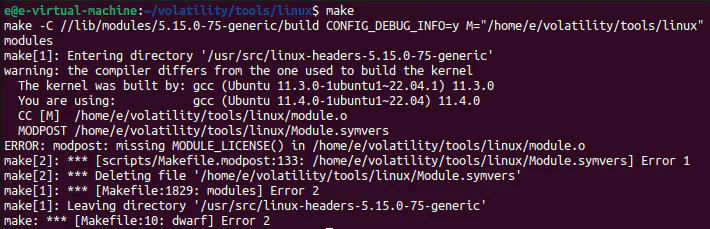
You might encounter this error where it says “missing MODULE_LICENSE()”. You will need to add one line to module.c file to mention about the MODULE_LICENSE.
echo 'MODULE_LICENSE("GPL");' >> module.cThis will add the license to the last line of module.c file, which will then solve the problem. For more information, you can refer here.
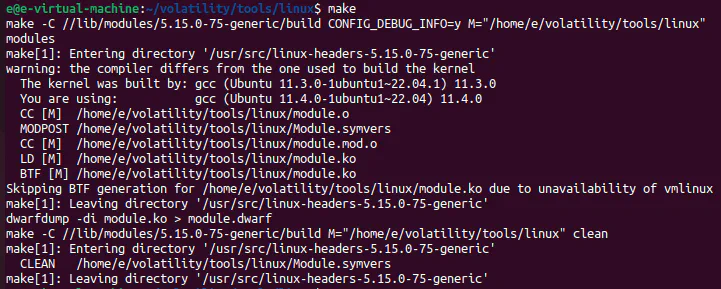
The image above shows the successful output of make command which successfully created a module.dwarf file for us.

Get the System.map of our specific kernel version and copy the file name to be used later. System.map has the physical memory location for everything that is required by kernel, and we are going to use it to build our profile.
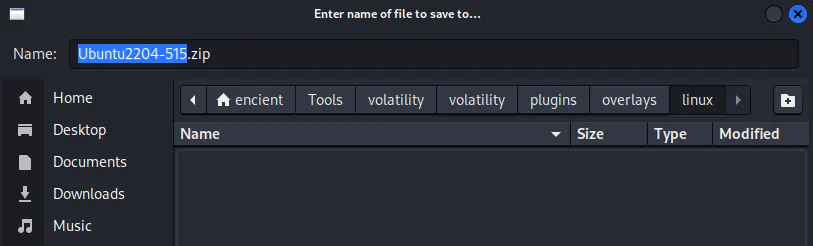
sudo zip volatility/plugins/overlays/linux/Ubuntu2204-515.zip tools/linux/module.dwarf /boot/System.map-5.15.0-75-genericvolatility/plugins/overlays/linux/Ubuntu2204-515.zip: This is the file name that will be created (and its path). It will be shown later as the profile name in Volatility
tools/linux/module.dwarf & /boot/System.map-5.15.0-75-generic: These two files will be zipped and it will be the profile (which is Ubuntu2204-515.zip)
![]()
Then, run volatility with --info to get the information page which will list available profiles and commands of Volatility. Use grep to search for string “ubuntu”, and -i will help search for the string case-insensitively.
Once the profile created, we can then move the profile to our own machine to analyze our memory dump with the newly created profile.
You can download the profile to the same location as mentioned in section before.
💡 There are many ways to transfer the file, you can just drag and drop from virtual machine to host machine, or in my case I hosted a web server to transfer the file.
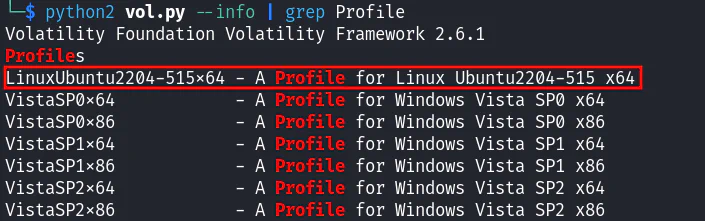
Once done, run the same command again to verify the successful import of the profile. I grep ”Profile” this time to see all the profiles available.
Although everything seems done and successful, we might face the error below when we are to use start analyzing our memory dump using the newly imported profile:
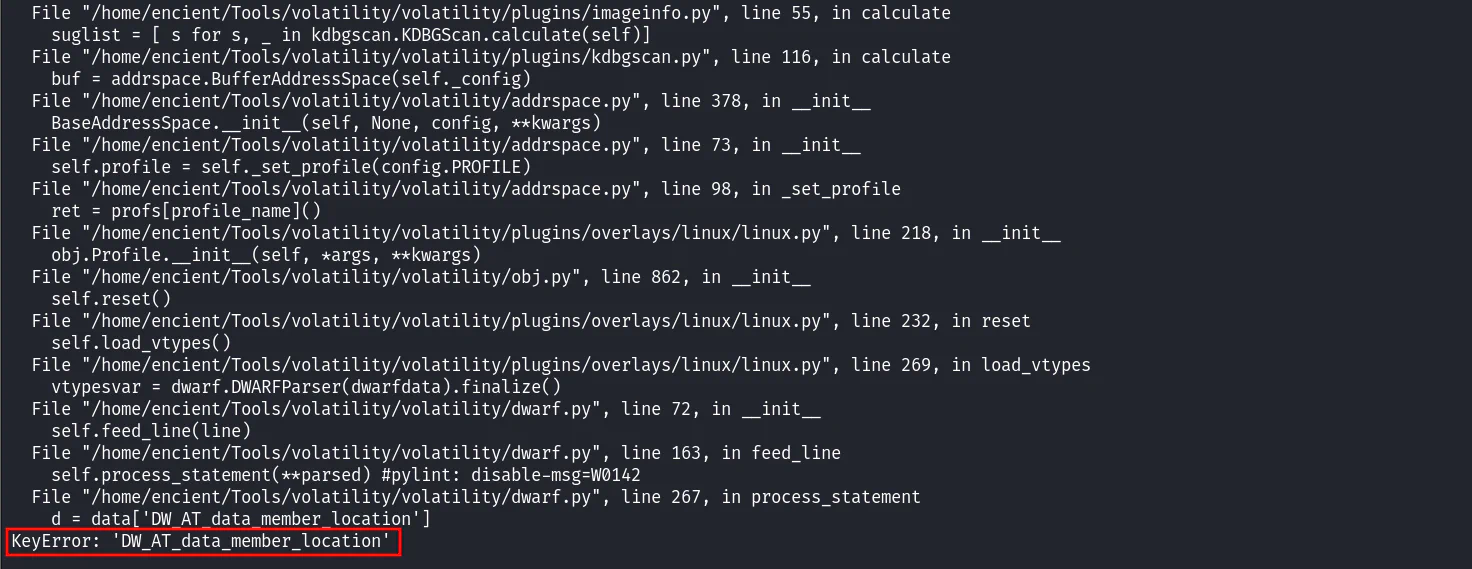
It is common Volatility 2 issue as it does not support newer kernels, which you could find the issue here.
git clone https://github.com/miszr/volatility.git
git branch -a
git checkout dwarf-5
git merge origin/patch-1
The solution has been given here, where we need to clone another version of Volatility 2.
git branch -a: Show all branches available
git checkout dwarf-5: Switch to branch named dwarf-5
git merge origin/patch-1: Merge changes from origin/patch-1 branch with dwarf-5

With this, we can then successfully analyze our memory dump without any issues.